I am very excited about my new website.
Let me know what you think!
 It has been one of those crazy weeks when I did a lot but don't have much to show for it. My friend, Denise came to visit and we cut 20 balls of yarn into 4 yard cuts and then knotted them together randomly and rolled them into this big ball. Now I have to figure out what to do with it! I am open to all suggestions. We also spent time in the dye studio with Debra and here are some of the results. I dyed silk and polished cotton and did a lot of overdyeing of yucky fabrics.
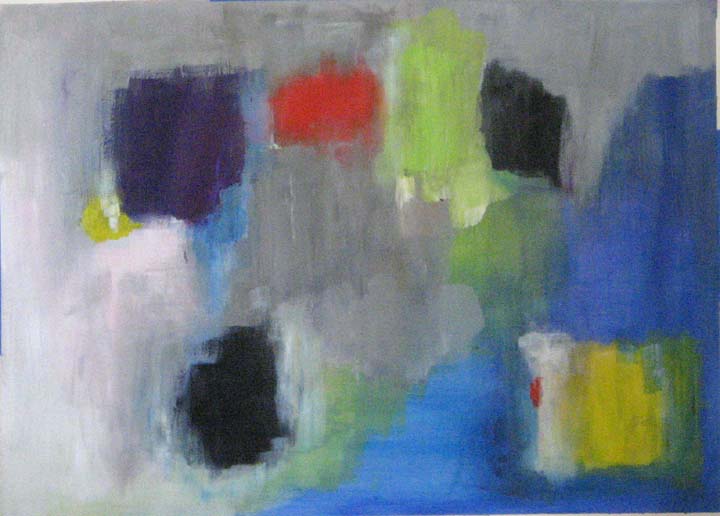
 I also spent time fusing Wonder Under to the back of fabric and slicing it into different shapes in preparation for a "summer" series. It has been hellishly hot here so yellow, orange and red seemed appropriate with a touch of purple to cool us down.
 Okay, I can not tell a lie. I made this quilt 5 years ago to celebrate my 50th birthday. As you know, the Phoenix rises out of the ashes and is reborn. So I figured that was a good way to start the next 50 years. This piece hangs in my studio and watches over me while I sew. It measures 58 x 70. Each feather was free hand quilted and the purple feathers and head are wrapped around timtex so they stand off the quilt. I put in 20 hours satin stitching the flames alone. They whole piece took me 65 hours and I do remember that it was pure fun.
 Recently I was introduced to Perfect Circles, an easy and quick way to make fabric circles for my quilts...and as you can see, I am hooked. After making a number of circles I had to ask myself...what the heck am I going to do with them? Then it dawned on me...crop circle inspired quilts.
 This is just one of the many fabulous patterns. Needless to say, I am inspired. How about you?
 I have been reading about fabric paper and although I did it once with my quilt "Reaching for Torah", I wanted to try it again. The weather was gorgeous so I set up a work table outside covered in plastic and put down my piece of muslin. I watered down white glue and merrily sloshed it onto the fabric using a foam brush. I did small areas at a time so that the glue didn't dry before I was ready for it to. I placed tea bags randomly onto the fabric and covered them with a coating of glue. My friends and I had saved tea bags all winter and after they are used and dry out it is easy to open them up and dump the tea. I love the colors that the tea stains the paper. You can see that I had a few circular tea bags and a coffee filter too. I added some mulberry paper that had similar colors and let the whole thing dry. The next day, I covered it with a teflon pressing cloth and ironed both sides and it flattened out beautifully. I may cut it up or I may quilt it as is. For now, it is hanging on my design wall until I get a brilliant idea.

 I used clear buttons and handmade lace pieces to highlight this snowy scene.
 I love this picture of them sitting on the car.
 And this is my favorite of them all. Couldn't my Mom have been in a Betty Crocker commercial? Here she is with her first Thanksgiving turkey. The picture just screamed for rickrack!
 Here are more pages from the cloth journal. I love the paw prints with the dog.
 This is the only picture that my Mom did not want in the journal. Any idea why?
 My Dad was a pilot in World War II. They met at UCLA after the war.
 The lace squares were hand made by my father's relatives.
 We got some wonderful blank cloth books in the quilt store and after seeing a blog by Bee, I just had to try my hand at decorating pages. I opted for old photos of my parents - my mother in particular. I used buttons, ribbon and embroidery for embellishment.
 I started out by cutting the doubled pages apart and sewing the framed pictures to the background of each page. I tried spraying the background of this page with paint but I didn't have much control over the paint. The reason for slitting the pages is so that your stitching doesn't show on the back side. When the pages are all completed, you sew them together again in pairs.
 This one has old hand made lace around the picture. It was handed down through the family and probably made by my father's mother.
 I had a great time playing with fabric, embellishment and design. Next time I will show you more pictures from the book.
 I took an online class by Susie Monday about using graphics on fabric. I decided to print the word green on thick handmade paper from Thailand. I used different fonts and different shades of green. In some places the paper was a little too thick going through my printer so there are dark ink marks but for the most part, the lettering worked well. I cut out the individual letters and glued them to the background fabric after playing with the arrangement.
 I sewed down the skeleton leaves to my batik background and did some hand stitching with my hand dyed threads. It was a wonderful opportunity to use what I had learned in a project. Be sure to check out the other pieces for this challenge at www.12connected.blogspot.com
 I created this quilt for the SAQA show called Creative Force. What is more creative than Mother Nature at work? I used two photographs that I took while on the Oregon coast as my guide. The quilt did not get into the show but only 50 quilts were chosen from more than 350 so I don't feel too bad.
 I did a lot of intense quilting on beautiful hand dyed fabric. I used Angelina fiber to get the splash of the waves and added seed beads by hand.
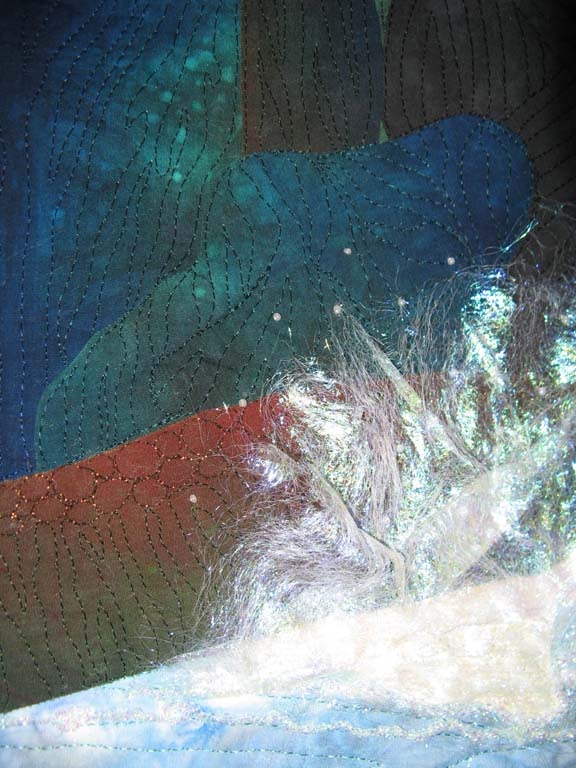 Here you can see the Angelina better.
 It took me 12 solid hours to quilt the whole thing but I listened to some good books on CD in the process and I truly enjoyed watching the quilt unfold before me.
 This is a close up of the quilt that I did for Kreinik using their blending filament and braid. I wrapped some metal washers with the braid to get those perfect circles.
 I used the blending filament to couch down the braid and because the colors match, it was perfect.
 Here is the whole quilt....looks like outer space to me.


 This is a close up of Tina Somerset's Kangaroo quilt.
 Shirley Snowden opted to create bowls and they remind me of Chihuly's glass pieces.
 Rona Barnes made a purse with lots of compartments.
 Lola made this container using wire and beads.
 My piece is made out of wool felt.
 Here is Elaine Turcke's piece using photo transfer and a 3-dimensional apron.
 Debra Wolfson used her own dyed fabrics and thread.
 I have been making pillows using some wonderful thread made by Kreinik. The kitty was drawn by my friend, Jayne Wangen years ago and we made patterns for hand embroidery from it. It is called Purr-fect Pillow after our cat by the same name. For this pillow, I sewed every line twice using Kreinik's blending filament.
  Sunny Smiles is another of Jayne's designs. This time I used braid and sewed it down with the blending filament. I love the thickness of the braid and the sparkle in all of the threads that I used.
 I found the threads to be strong and easy to work with. I have a small art quilt to show you using these threads in the future!
 My latest challenge was to create my own fabric and use it in a quilt. I stenciled with Lumiere paint and rubber stamped with paint to create the texture on the bodies and the borders. I used embroidery floss wrapped around those white plastic curtain rings to create the eyes and I used wire for the balloon strings.
 It was fun to return to the Dunderhogans again.
 I just completed a wonderful online class through Joggles.com called Scrumptious Surfaces. We began with a picture which we simplified into lines. I enlarged the lines and outlined them in embroidery thread. Then I got to play with stitches to fill in the spaces. I sewed on linen which I have never used before and I learned new stitches along the way.
 I used wooden buttons that I found at yard sales and stone beads that I purchased along the way. The chiffon circles are sewn down with seed beads interspersed.